
Core features
TUN Mode Explained: Setup and Every Setting
The previous guide covered when TUN is the right tool. This one is pure practice: turning it on, what the settings mean, and verifying it works.
Three steps to enable
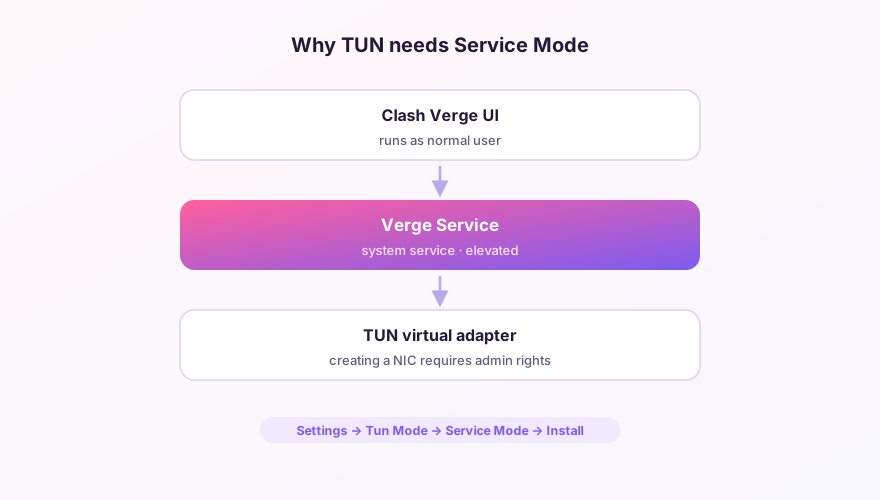
- Install service mode: Settings → Service Mode → Install, accept the UAC prompt. Status should show active;
- Flip the TUN switch on the same Settings page. A new network adapter named Mihomo appears in your adapter list;
- Turn off System Proxy (optional but recommended) — TUN already captures everything; leaving both on just complicates debugging.
Verify it's working
Run curl ip.sb in a terminal — a tool that normally ignores system proxy. If it returns your node's IP, TUN is doing its job. Alternatively, watch the Connections page: you should see entries from all kinds of processes, not just your browser.
The settings, decoded
- Stack:
Mixedbalances speed and compatibility — keep it. TrygVisoronly if some app misbehaves; - DNS hijack: default
any:53grabs every DNS query on port 53 and hands it to the core, preventing DNS leaks. Leave it on; - Strict Route: stops traffic from slipping around the TUN adapter. Safer on, but can break LAN discovery (printers, NAS) — your call;
- Auto Route: lets Verge manage the routing table. Keep on.
Tip
Under TUN, DNS runs on fake-ip: apps receive placeholder addresses like 198.18.x.x while real resolution happens remotely. The full story and whitelist syntax are in the DNS guide.
Common failures
- Switch greyed out or errors on toggle → service mode isn't installed properly, see fixing service mode;
- TUN on = everything offline → usually DNS; try disabling Strict Route first, then check for other VPN software fighting over routes;
- VMs or WSL2 lose network → the TUN default route affects them; add direct rules for their traffic or fall back to System Proxy.
Don't have Clash Verge yet?
Download v2.5.7Windows 64-bit installer · v2.5.7 · free & open source